It seems I haven't been creative lately, I've just been making recipes that I find through other sources. Which is all fine and dandy of course, but I was getting frustrated with my own lack of creativity when it happened. I looked up from my desk and saw a woman smiling, laughing, and skipping in SLOW MOTION while cradling several boxes of Girl Scout Cookies. Where had they come from?! After 5 minutes of detective work I tracked down the source and ordered all the boxes she had left, which only totaled 3 unfortunately. It was then that the vision of Caramel DeLite cupcakes first danced through my head. Thus, these beautiful beasts were born.
It started with a recipe for a vanilla coconut cupcake from the lovely The Baker Chick. That recipe can be found here:
http://www.the-baker-chick.com/2011/05/vanilla-coconut-cupcakes-with-caramel.html
Vanilla Bean Coconut Cupcakes (courtesy of The Baker Chick)
2 13- to 14-ounce cans un-sweetened coconut milk (preferably organic), which you will reduce
2 cups all purpose flour
2 1/4 teaspoons baking powder
1/2 teaspoon salt
3/4 cup (1 1/2 sticks) unsalted butter, room temperature
1 1/3 cups sugar
3 large eggs
Seeds scraped from 1 split vanilla bean or 1 1/2 teaspoons vanilla extract
1 cup shredded coconut
Directions:
1. Make the coconut milk reduction. This also will need to chill before using it. You can speed this up in the freezer (mine needed about an hour,) but if you have the time, do it the night before.
Bring coconut milk to boil in large deep saucepan over medium-high heat (coconut milk will boil up high in pan). Reduce heat to medium-low; boil until reduced to 1 1/2 cups, stirring occasionally, 25 to 30 minutes. Remove from heat; cool completely. Transfer to small bowl. Cover; chill (coconut milk will settle slightly as it cools). DO AHEAD Can be made 2 days ahead. Keep chilled.
2. Position rack in center of oven; preheat to 350°F. Line eighteen muffin cups with paper liners. Whisk flour, baking powder, and salt in medium bowl. Using electric mixer, beat butter in large bowl until smooth. Add sugar; beat on medium-high speed until well blended, about 2 minutes. Add 2 eggs, 1 at a time, beating well after each addition and occasionally scraping down sides of bowl. Beat in seeds from vanilla bean and remaining egg. Add half of flour mixture; mix on low speed just until blended. Add 1 cup reduced coconut milk; mix just until blended. Add remaining flour mixture; mix on low speed just until blended. Divide batter among muffin cups.
Makes 18 cupcakes
They are originally Vanilla Bean Coconut Cupcakes with Caramel Frosting. I nixed the frosting part, and added 1 cup of shredded coconut to the batter.
Before I could even gather my ingredients I had to deal with this:
 Poor, emo, abused dog doesn't have a dog bed in front of every single sunny window in the house. Woes her.
Few ingredients for a somewhat complicated cupcake and process.
 After a crazy cupcake liner spending spree I happened to have some on hand that matched the colors of the cookie box. Fabulous.
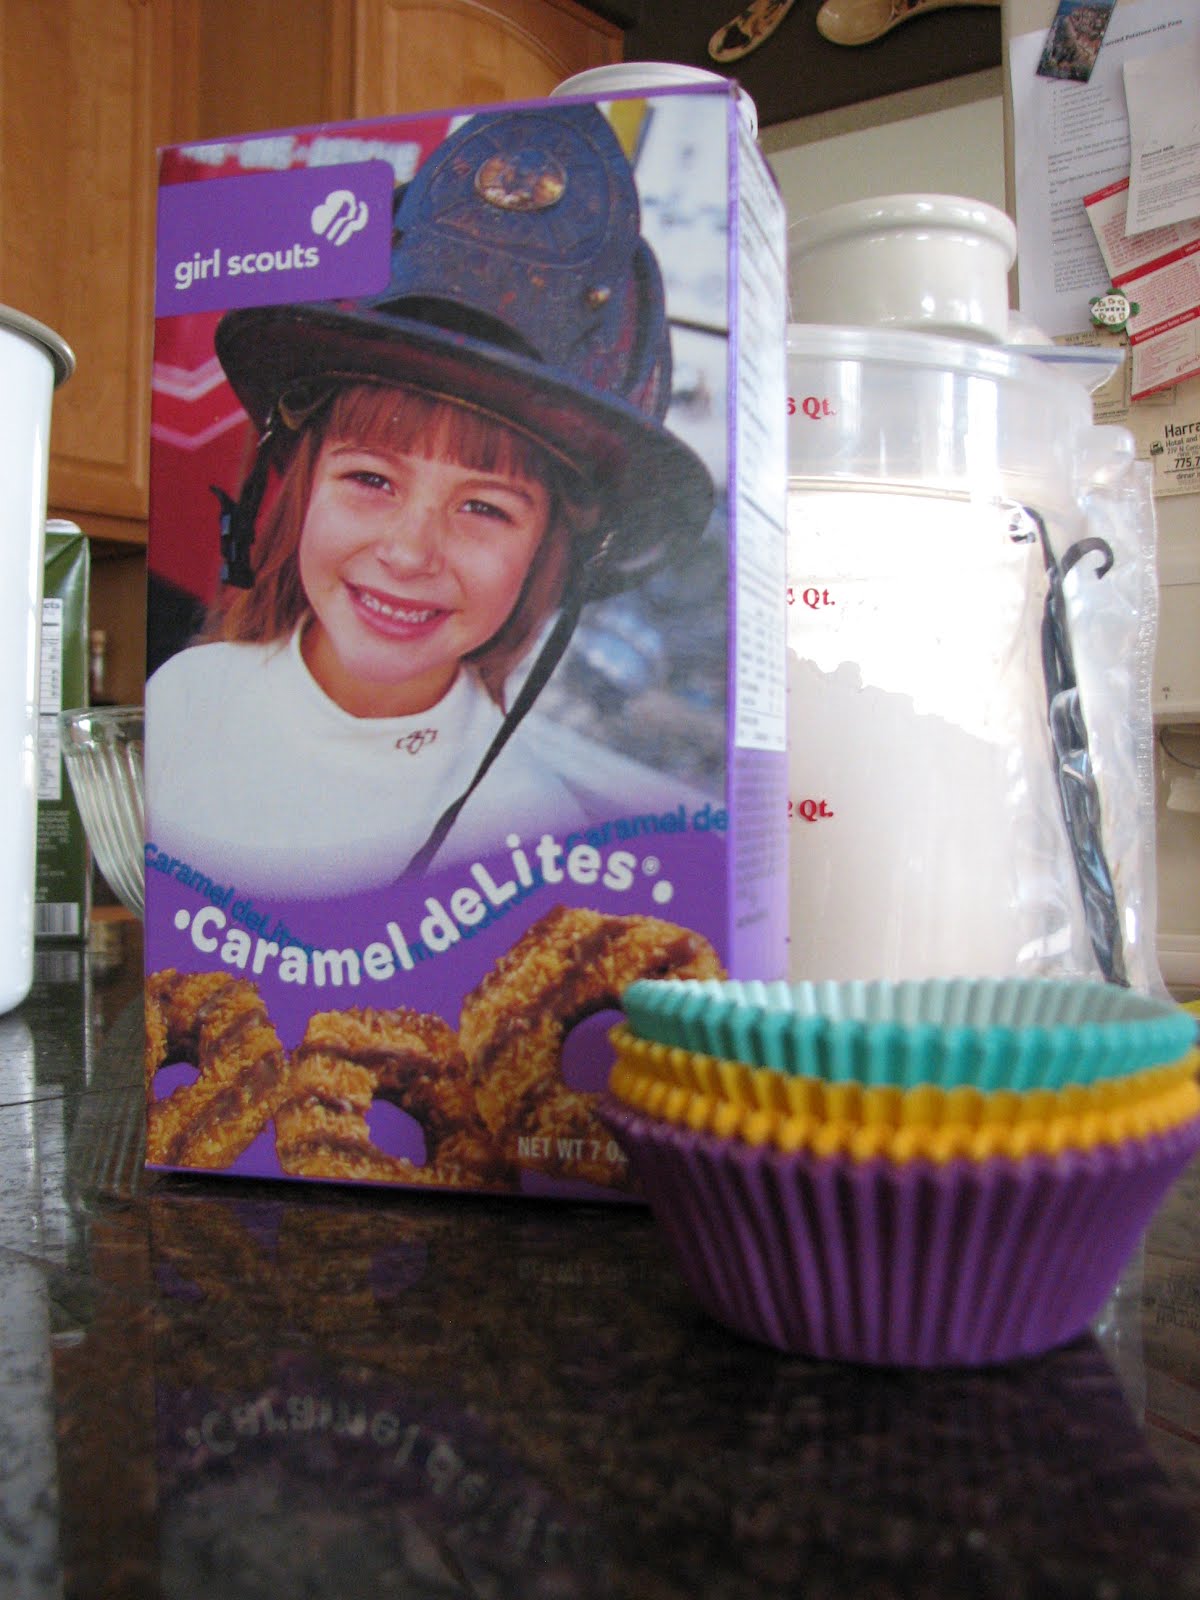 This was my first time working with vanilla beans. No sweat right? Just slice down the side and scraped those lovely seeds right on out huh? Yeah, not so much. The first vanilla bean was ruthlessly manhandled and destroyed. Don't worry, it wasn't all a loss. I chucked it into a jar with some sugar so I'll have some nice vanilla sugar available in a few weeks.
 So these beautiful little black specks you see below were hard earned. I will forever appreciate seeing them in anything I eat from now on.
 Apparently drama dog wasn't getting enough sympathy where she was, so she loudly relocated to a spot directly in my line of sight.
 Okay, onto the assembly. After using the recipe above (seriously, check The Baker Chick out, she is amazing) you will have a bowl full of lovely batter to dish out. Into a much loved muffin tin as you see here. Even the cookies are in awe of such lovely batter.
 Then the magic happens, plop one of those beautiful cookies right on top:
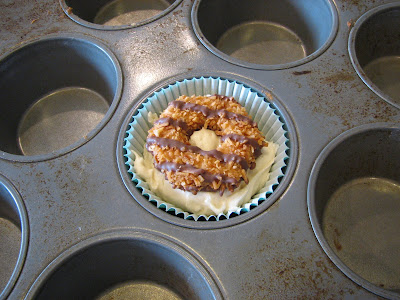 I mean really? If I had a sweet tooth I might have to eat this before it is even baked. But I don't, so I didn't, but I was tempted.
 I then put this test cupcake in the oven for 20-22 minutes, until it looked like this:
 After I assembled the rest and popped them in the oven, I started on some chocolate ganache. You didn't think I was going to leave the cupcakes practically naked did you?
 Apparently drama dog wasn't getting enough sympathy where she was, so she loudly relocated to a spot directly in my line of sight.
 Okay, onto the assembly. After using the recipe above (seriously, check The Baker Chick out, she is amazing) you will have a bowl full of lovely batter to dish out. Into a much loved muffin tin as you see here. Even the cookies are in awe of such lovely batter.
 Then the magic happens, plop one of those beautiful cookies right on top:
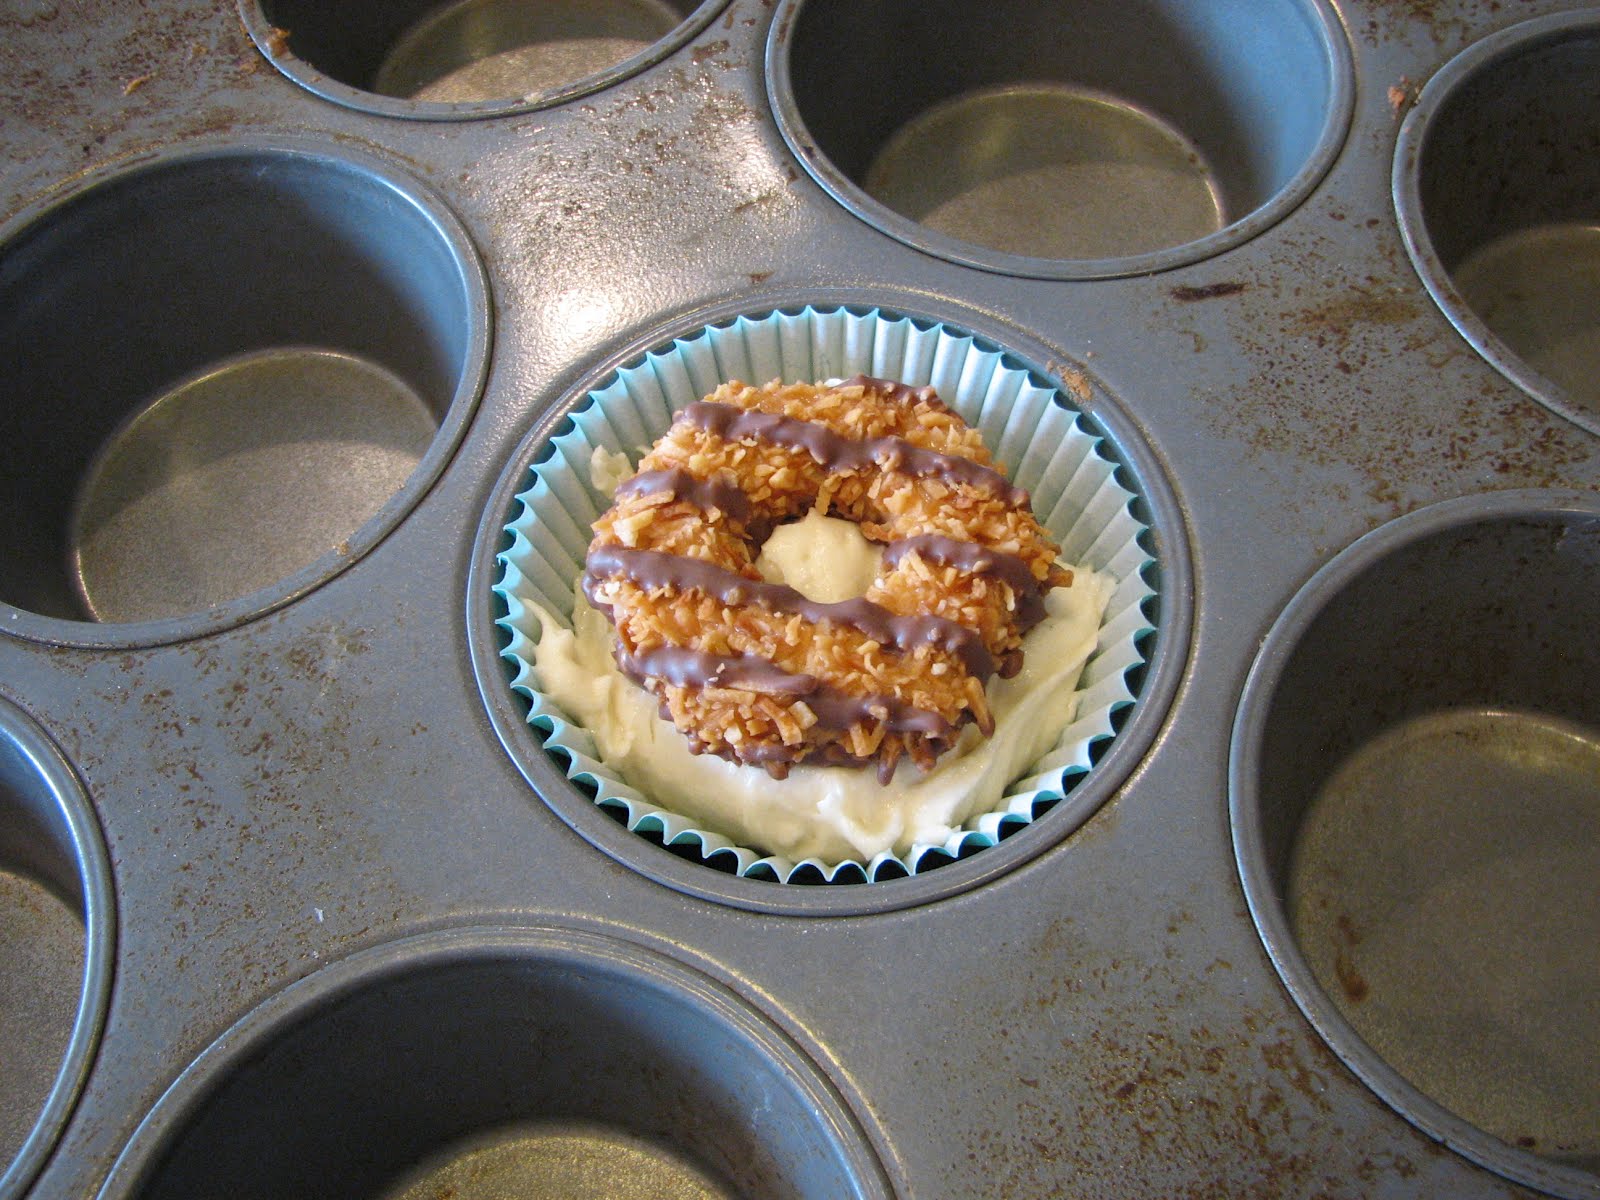 I mean really? If I had a sweet tooth I might have to eat this before it is even baked. But I don't, so I didn't, but I was tempted.
 I then put this test cupcake in the oven for 20-22 minutes, until it looked like this:
 After I assembled the rest and popped them in the oven, I started on some chocolate ganache. You didn't think I was going to leave the cupcakes practically naked did you?
I filled a dish with hot water, and put a smaller bowl inside. In the small bowl I put 1/2 a cup of cream.
 To that I added 1 cup of semi sweet chocolate chips, 1/2 a cup at a time.
 Stir stir stir and the chocolate will start to break up. The cupcake in the back can't wait to get his chocolate ganache jacket on.
 It wasn't meant to be though, because at that time I realized I neglected to taste the project.
 Mmm yes, yes I like it very much thank you.
 After some gentle stirring and melting, your ganache will look like this. Lovely.
 Now there are 16 cookies in a box. So that would mean I had 16 cupcakes to decorate right? Wrong. Apparently no one in the house can resist the lure of Caramel DeLites because when I opened the box, that I asked no one eat, there were only 6 cookies left. Yeah so.....
 To that I added 1 cup of semi sweet chocolate chips, 1/2 a cup at a time.
 Stir stir stir and the chocolate will start to break up. The cupcake in the back can't wait to get his chocolate ganache jacket on.
 It wasn't meant to be though, because at that time I realized I neglected to taste the project.
 Mmm yes, yes I like it very much thank you.
 After some gentle stirring and melting, your ganache will look like this. Lovely.
 Now there are 16 cookies in a box. So that would mean I had 16 cupcakes to decorate right? Wrong. Apparently no one in the house can resist the lure of Caramel DeLites because when I opened the box, that I asked no one eat, there were only 6 cookies left. Yeah so.....
I really should have listened and practiced the "drizzle" technique before going crazy with two precious cupcakes out of 6, but I did not. So the first two ended up looking like this. Eek.
 After some practice I got one that looked halfway decent.
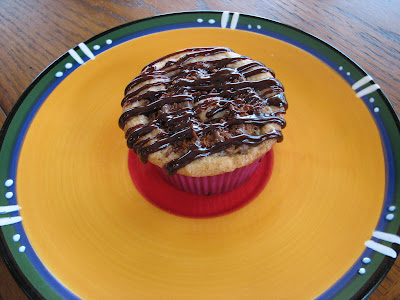 And here it is.
 In all of it's yummy cupcake glory.
 Word on the street is that the lovely Girl Scout Cookie fairy will be getting more cookies this weekend. And I have five boxes with my name on them. These will be made again. I may even dream up some Mint Thin concoction while I am dreaming tonight...
 The other cupcakes got a regular ganache topping, a few got a sprinkle of coconut. Six of them got packaged up to bring to some unsuspecting friends who live down the road.
 Along with some haystacks I made by stirring leftover coconut into the leftover ganache. Oh the things my poor neighbor friends have to endure. The house across the street is for rent? Who's interested?
 A little bit complicated? Absolutely. Absolutely delicious? You bet your you know what.
 After some practice I got one that looked halfway decent.
 And here it is.
 In all of it's yummy cupcake glory.
 Word on the street is that the lovely Girl Scout Cookie fairy will be getting more cookies this weekend. And I have five boxes with my name on them. These will be made again. I may even dream up some Mint Thin concoction while I am dreaming tonight...
 The other cupcakes got a regular ganache topping, a few got a sprinkle of coconut. Six of them got packaged up to bring to some unsuspecting friends who live down the road.
 Along with some haystacks I made by stirring leftover coconut into the leftover ganache. Oh the things my poor neighbor friends have to endure. The house across the street is for rent? Who's interested?
 A little bit complicated? Absolutely. Absolutely delicious? You bet your you know what.
 Enjoy!


